This blog post is a "build" post about making a two-level catacombs hallway, followed by a gallery of some other things I've made using a rudimentary set of skills, Project Bricks and hot glue.
Here's the photos in ascending chronological order, with comments underneath. Here's the materials I used:
- Project Bricks (tan), which are definitely available (and cheaper) at your local hobby store, and in various colors
- Scotch Thermal Laminator and some thermal laminator paper
- A very fine point sharpie marker for drawing a square grid
- Generic pink hot glue gun and half a dozen sticks of glue
- Reaper mini 02789, Talarand Blackguard, for testing the weight
The whole point of this was to create a two story hallway, where the players could set up an ambush from above on some sneaksy Drow folk beneath them. In my campaign's encounter, the players first detected (with a Dungeoneering check) that the floor was hollow, and then stealthily spied ahead that one of the "planks" of stone had been broken, revealing the scene below.
One cautionary note - I (William) am not one to make this look cosmetically perfect. You won't be seeing five coats of paint and sealant applied here. Dress up your model all you want, but in my case, I cooperatively applied five coats of imagination with my players.
And here we go:
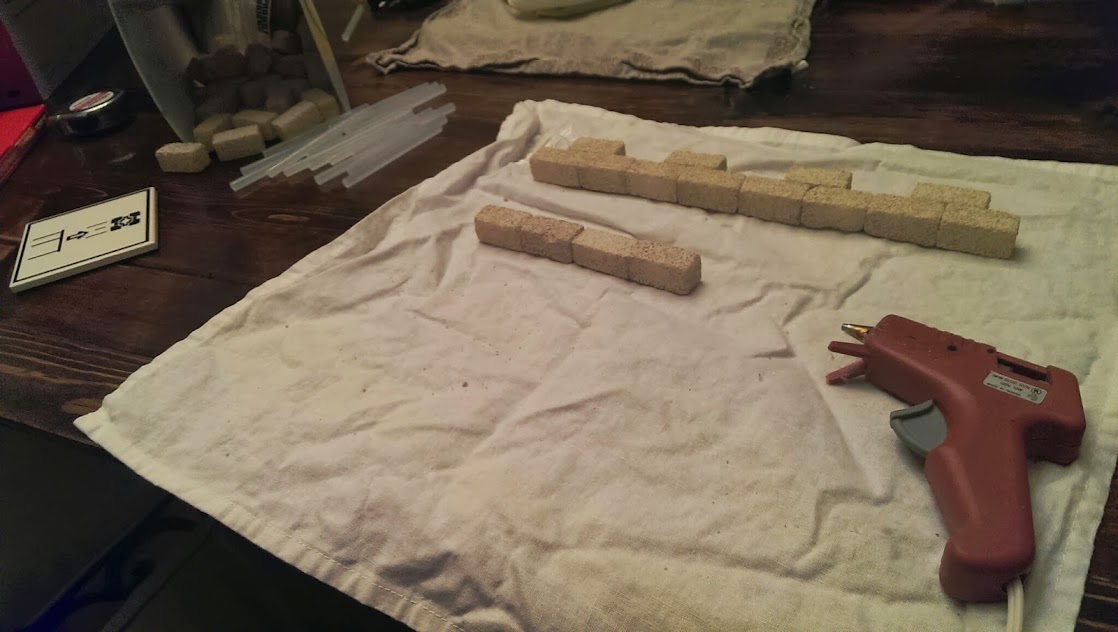
Here's how I started. Putting the bricks together with hot glue is insanely easy. A bead of glue a few millimeters wide, pressure for a few seconds, and the bricks are like your podcast hosts Chad and William - completely inseparable, unless one of our spouses has unignorable career prospects and has to move to the East Coast.

The gaps in the walls I'm building here are for two important reasons. One, the tombs inlaid into the walls of this catacomb are like such, with wrapped bodies inside as per the local ceremonial burial tradition. Think the inset tombs that Skyrim's Draugr rest in. The second reason is to provide more visibility through the walls so that players can see their miniatures.

In the background above, you can see my kid taking some blank 3mm lamination sheets and using a very fine point Sharpie marker to trace a 1" x 1" grid onto the clear lamination paper, run through the thermal laminator with nothing inside (so that it is clear). She's using one of the larger 8"x8" official WotC Dungeon Tiles sets.

Preparing floors one and two here. Important info here: the idea is that the passageway of this catacomb is three squares wide. The "fourth wall" will be open to allow my players' stupid clumsy fingers in and out of both floors of the apparatus without knocking everything over. Never fear, AngryDM, my cudgel-fingered players still reached in and knocked everything down at least twice.

This is the idea of the two floors. After abandoning certain other designs which will go unmentioned, I decided on suspending two solid half-sheets of transparency paper on three sides between these two pieces of wall. The fourth side of the two sheets of transparency paper would be left open, so that we can slide things inside them to create opacity.

One letter-sized sheet of transparency paper with a 1"x1" square grid Sharpied onto it later. I cut the paper in half longways and laid one 11" x 4" wide half over the other 11" x 4" wide half. This doubled the strength of the surface (for Mr. Blackguard) and allowed us to slip something thin and opaque between the two half sheets. She also took another piece of thermal lamination paper and cut it into 4"x1" strips, and Sharpied their middles dark. (FYI: Sharpied is a past tense verb.)


Above, the kiddo finishes it off by sliding the 4"x1" strips of markered transparency. You could just as easily use the official WotC DND cardboard dungeon tiles here, or use your laminator to laminate some other kind of surface. Again, no cosmetic fanceries here.

Mr. Blackguard obliges by testing the strength of the transparency, which has been secured on three sides with heaping globs of hot glue. Don't be stingy with the hot glue, even though the thermal lamination paper and the Project Bricks bond hard almost instantly. They really are ideal materials to bond with hot glue.

I raised the apparatus to 4 bricks high on the first floor, to allow my barrel-fingered players better access to move actions underneath the transparency.

The apparatus in action later that night during the campaign. Note how we removed one of the Sharpied strips of laminating paper to denote that the stone plank there was gone. The gnome rogue in the party reconnoitered the gap in the floor, revealing the Aspect of Sviesos (a Drow Spider Queen) and her priestess assistants below.

The Drow (rhymes with go) had no idea the PC's (and the shaman's spirit companion shrubbery) were coming... until the fighter miserably failed his Stealth check (of course).

That didn't matter much when the twin Goliaths in the party brought their military pick and battle axes down on the slab in front of them, sending it crashing in pieces onto the Drow priestess below. We just moved the strip of Sharpied transparency to the first floor.


Their death-from-above ambush was a success.

Upon first reveal, my players said "it looks like a piano!" and "cool!" After explaining the rules that the invisible fourth wall was there, bounding the three-square wide hallway, they got the idea and it allowed them to work their strategery.
William's wife took this super artsy video of our campaign session with her instafacevinesnap thing.
In conclusion, Project Bricks are a ridiculously easy way to add some 3D structure to your game. I've used them and a hot glue gun to build sets before, from high castle wall parapets to boats to small "tables" of the bricks that are pretty useful. Some gallery below. You may have seen some of these pop up on our Twitter account before, including the "Ambush into the Setting Sun" encounter of the podcast gadget, from Season 2, Episode 7.


